People have been making ice cream far longer than the invention of electricity so there’s no reason you can’t make ice cream and sorbets at home without a machine.
The advantage to using an electric or hand-cranked machine is that the final result will be smoother and creamier. Freezing anything from liquid-to-solid means you’re creating hard ice crystals, so if you’re making it by hand, as your ice cream or sorbet mixture freezes, you want to break up those ice crystals as much as possible so your final results are as smooth and creamy as possible.

Machines are relatively inexpensive nowadays with models costing less than $50, and yes, I’ve seen the ball, but if I started tossing one of those around the streets here in Paris, I’d probably get even more strange looks than I normally get. (Plus you’ll need to lug some rock salt home as well.)
But not everyone has the space or the budget for a machine, so here’s how you can do your own ice cream at home without a churner. I recommend starting with an ice cream recipe that is custard-based for the smoothest texture possible. You can use my Vanilla Ice Cream or another favorite, or even thisStrawberry Frozen Yogurt recipe using Greek-style or drained yogurt. The richer the recipe, the creamier and smoother the results are going to be.
Ice cream made this way is best eaten soon after it’s made—which shouldn’t be a problem.
Making Ice Cream Without A Machine
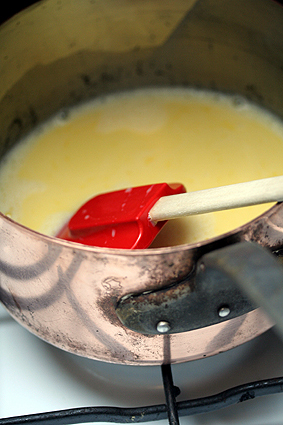
1. Prepare your ice cream mixture, then chill it over an ice bath.
2. Put a deep baking dish, or bowl made of plastic, stainless steel or something durable in the freezer, and pour your custard mixture into it.
3. After forty-five minutes, open the door and check it.
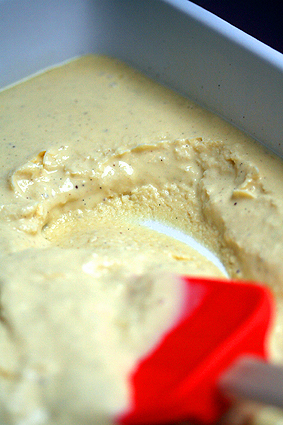
As it starts to freeze near the edges, remove it from the freezer and stir it vigorously with a spatula or whisk. Really beat it up and break up any frozen sections. Return to freezer.
4. Continue to check the mixture every 30 minutes, stirring vigorously as it’s freezing. If you have one, you can use a hand-held mixer for best results, or use a stick-blender or hand-held mixer.
But since we’re going low-tech here, you can also use just a spatula or a sturdy whisk along with some modest physical effort.
5. Keep checking periodically and stirring while it freezes (by hand or with the electric mixer) until the ice cream is frozen. It will likely take 2-3 hours to be ready.

You can easily make Stracciatella ice cream with Italian-style chocolate chips:
Drizzle pure melted dark or milk chocolate (about 5 ounces, 140 g) over the almost-frozen mixture, then stir, breaking up the ribbons of chocolate as they start to freeze, to create little ‘chips’.

Transfer the ice cream to a covered storage container until ready to serve.
Ingredients
1 cup of milk
1 tablespoon sugar
1/2 teaspoon vanilla extract
Alternate flavor: if you want chocolate ice cream, add 1 tablespoon of cocoa powder
4-6 tablespoons salt
2 trays of ice cubes
Small amount of butter
5 teaspoons flavored syrup
Freezer Bag Method
1
This is good for making individual servings of ice cream to be eaten promptly after making. The video at the bottom of this article shows how to make ice cream with a sandwich bag.

2
Take roughly two quarts of ice, crushed if possible, and place it into the gallon-sized bag with rock salt (also known as coarse salt). Ideally, the gallon bag will be roughly half full with the ice and salt mixture.

3
Place the sealed quart-sized bag with the ingredients into the gallon-sized bag. Make sure the bags stay sealed. Do not allow the contents to mix at any time. If the bags don't seal sufficiently, seal the top of both bags to ensure they don't open during shaking.

4
Gently agitate, massage, and shake the bags for about fifteen to twenty minutes. In this amount of time the contents of the quart bag should start to turn into solid ice cream. It is important that you are mixing the contents of the inner bag, but you don’t want to be so aggressive that you burst the inner bag or cut it on the ice. Double-bagging should prevent this. If your hands get uncomfortably cold, use a towel or an old T-shirt to hold the bags as you massage them; the bags will be quite cold and might become slippery with accumulated condensation. Consider using gloves or massaging while holding onto the top seal if a towel or similar cloth is not available.

5
Remove the finished ice cream from the sandwich bag and serve.

Pot-Freezer Method
1
This is how ice cream was typically made before modern refrigeration, using ice cut from lakes and ponds. Hand-cranked ice cream machines are a variation of the sorbetière (a covered pail with a handle attached to the lid) which is a French adaptation of the pot-freezer method.
2
Put the ice cream ingredients in a bowl.

3
Put the bowl in a tub filled with ice and salt. Make sure the ice and salt mixture doesn't spill over the edges or into the bowl.

4
Mix the ingredients of the bowl vigorously. The salty ice water will absorb heat from the mixture, bringing it below the freezing point of water and turning the mixture into ice cream.[1] It's important to mix as thoroughly as you can to prevent the formation of ice crystals. If you can, use a whisk or better yet, a hand-held mixer.

5
Remove ice cream from the bowl and serve.

Freezer Method
1
This method works best with a custard-based recipe that incorporates eggs, because the result will be much smoother. Since it involves a good bit of waiting, however, it may not be the most immediately gratifying for kids.[2]

2
Pour the ice cream mixture into a deep baking dish, or bowl made of plastic, stainless steel or something durable in the freezer.

3
Put it in the freezer for 30 minutes.

4
Check the mixture. When it starts to freeze at the edges, take it out and stir it vigorously with a spatula until all of the ice crystals are broken up. If you can, use a whisk or a hand-held mixer.

5
Check and stir every 30 minutes until the mixture turns into ice cream. This might take 2-3 hours.

Coffee Can Method
1
This is very similar to the bag method, except instead of using two bags, you use two coffee cans, one bigger than the other.

2
Put the ice cream mixture in the smaller coffee can. Seal tightly.

3
Put the smaller coffee can in the big coffee can along with ice and rock salt. Seal the large can tightly.

4
Shake the large can vigorously for about 10 minutes. Kids can roll or throw it around, but make sure the cans are sealed well. Do this step outside, just in case. Check the smaller coffee can to see if the mixture has turned into ice cream yet. If you see ice crystals forming, stir or whisk the mixture.
5
Continue shaking, rolling, or throwing until ice cream is formed.

Ball Method
1
This can only be done with a commercial product that mixes ice cream within a specially made ball with two chambers.[3]
2
Fill the ice end with with ice and 1/2 cup of rock salt (3/4 cup if using the larger size ball) and close by hand.
Standard ice cubes may not fit. You might need crushed ice.
You'll probably need at least 10 ice trays' worth of ice.
3
Pour the ice cream mixture into the end with a metal cylinder. Leave an inch (2.5cm) at the top for expansion and close by hand.
4
Shake, roll, and pass the ball around for 10-15 minutes. The ball will probably be heavier than you expect.
5
Open the ice cream end with the plastic wrench that comes with the ball. Scrape the sides of the cylinder with a plastic or wooden spoon (metal will damage the cylinder). Close the lid by hand.
Since the chamber is narrow and deep, stirring the ice cream might be difficult. If necessary, use the wooden handle of a spoon or spatula.
6
Check the ice end. Open the lid with the plastic wrench. Pour out any water and add more ice and up to 1/3 cup of rock salt. Close the lid by hand.
7
Shake, roll, and pass the ball around for 5–10 minutes.
8
Check the ice cream. Repeat the above steps as needed, or eat the ice cream as is.
When you pour the ice cream out, be careful that it doesn't spill into the raised decorative ledges and tight crevices; these may be very difficult to clean later on, especially if you use chocolate chips.
The ice cream tends to be "soupy" in the middle a
nd solid along the edges.
No comments:
Post a Comment